Thanksgiving 2007 Photos

Dad on the Stairs

My parents moved to a new house in the Charlotte, NC area over the summer (more specifically, to Cornelius, NC) and I went to visit them over Thanksgiving. Naturally, I took my camera along and I’ve posted my shots from the trip.

In addition to my usual camera gear, I also took along my WhiBal white balance card and it worked a treat. In particular with the turkey preparation scenes within the kitchen, the lighting was an amalgamation at best — there was cloudy-sky natural light coming through the windows, a few overhead CFLs and the occasional splash of incandescent light from the adjacent rooms. I’m not sure any sane person would have known how to manually set his or her camera’s white balance to properly account for that, but it was a complete non-issue with the WhiBal. Such a handy gadget, that.

Dallas Camera Club Scavenger Hunt Photos

Looking up at a traffic light at Griffin Street

The Dallas Camera Club holds a photo scavenger hunt each year — sometimes it’s in downtown Dallas while other times it’s elsewhere in the metroplex. (It’s confined to a general geographic area each year to help level the playing field.) Indeed, this year’s scavenger hunt was held downtown on a Sunday morning a few weeks ago. Here’s what was on this year’s list:

  • Reflections — it hadn’t rained recently, so street-reflections weren’t really in the cards, but there were other reflective things to find.
  • Geometric or Repeating Patterns — this was pretty tough, but I think I found a shot for this.
  • Looking Up — we just had to find a shot that looked upward, which might seem easy, but doing so artistically took some figuring.
  • Humanity — this one covered people, which might seem like a slam-dunk, but was actually tough since downtown Dallas is a bit deserted on a Sunday morning.
  • Texas or US Icons — I guess this primarily encompassed Texas or US flags, though I would imagine that other Texas- or US-themed items would qualify as well.

Anyhow, I’ve posted my scavenger hunt photos. I was pleased to be able to get a shot in each category, but that doesn't mean that I've “won” — the club hands out awards for the scavenger hunt based on the number of categories completed and the quality of those shots. The awards haven’t been announced yet, so I’m looking forward to seeing how those turn out.

The WhiBal Is a Sweet White Balance Card

WhiBal Before and After Example with Aaron and Jeremy

I’ve really been enjoying my new camera (a Nikon D80) since buying it in January. And other than the occasional blown highlights, I find that it usually takes pictures just as I’ve intended.

One helpful tip which I picked up from my brother (who also has a D80) is to manually set the white balance in each new shooting environment (such as incandescent, fluorescent, sunlight, or others). I don’t mean to imply that the D80 is bad at guesstimating a scene’s white balance on its own, but it’s an easy setting and often makes a real difference. (The D80’s white balance settings are covered on p.58 of the US-English manual, for what it’s worth.)

If you’re into photography, you may already be familiar with gray cards — a uniformly gray rectangle that can be used to fine-tune a shot’s exposure. A seemingly related device — but one which serves a completely different purpose — is a white balance card. These are also typically rectangles and they're usually gray. Rather than an exposure tool, however, white balance cards are used to provide a white-balance reference point within images (I’ll explain).

If you’ve ever played around with your camera’s white balance settings (or even if you’ve stuck with your camera’s automatic white balance mode), you’ve probably run across the occasional shot which ended up with the wrong white balance — one common symptom is Caucasian skin looking a bit yellowish or even orange-tinged. This happens because the light within the scene may not have been “white” in the first place; for instance, light during a sunset of very often reddish or orange. And even though the human eye can quickly adapt to varying colors of light, cameras aren’t always so lucky.

This is where a white balance card comes in. A white balance card is calibrated to a specific shade of gray; so, when it comes time to color-correct a photo, you can tell your image editor (such as Photoshop) to “adjust this photo’s color until the point under my eyedropper matches this certain shade of gray”. And if that sounds complicated, it’s really not — Adobe Bridge (a sister app to Adobe Photoshop) has an eyedropper that’s preconfigured for just this purpose. I’ve had a WhiBal white balance card for the past few months and I’ve been impressed by how easy it’s been to get perfect white balance in my shots.

Consider the photo at the top of this post, for instance. If you’ve seen my shots from this year’s SXSW, you may recognize it as one of my shots from the Helvetica screening. As it turns out, I had been taking some shots outside earlier in the day and, as it was cloudy at the time, I had my white balance set to “cloudy” — when it came time for the screening, though, I forgot to change it back to a more appropriate white balance setting (d’oh!). However, because I had taken a few WhiBal shots while I was there, none of that mattered. It’s like having a bottomless stack of “Get Out of Jail Free” cards when it comes to white balance.

I consider photography one of my hobbies, but I’m not one for frivolous baubles. Having said that, I make an exception for my WhiBal. It’s easy to carry around and the benefits are really there. And if you don’t quite have your head wrapped around this “white balance thing”, not to worry — the WhiBal site has section with videos that go over white balance and an example workflow with a WhiBal. I don’t have any affiliation with this company — I’m just a really satisfied customer.

Photos From My Trip to South Africa

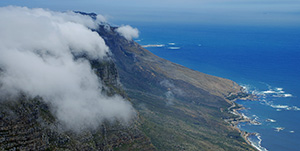
View From Table Mountain, Cape Town

As you might be aware, I went on vacation to South Africa in February with my family to celebrate my mom’s birthday. There’s not need to focus on numbers — or at least that’s what she would say ;) — but let’s just say that it was her 3Cth (hex) birthday. Anyhow, I’ve finished processing the photos from my trip to South Africa and I’ve posted those at Flickr.

I was also pleased to be able to make use of my new camera, a Nikon D80 that I had bought just a few weeks beforehand. I went with the 18 - 135 mm kit lens at the time and it worked out great. I’ll probably buy a faster lens at some point (this one is F3.5 - 5.6) — or maybe even one of those fancy vibration reduction lenses — but I wasn’t about to start dropping big money on accessories right after the purchase of the body & kit lens.

I was away for about two weeks and I took 110 shots. I selected about 60 of those to process and, in doing so, whittled down the list to 35. It’s not that I don’t like processing photos — once I get going, I find that it can have an almost zen-like quality — but some of them just didn’t work out for one reason or another. Most often, one of those reasons was that I ended up blowing out my highlights for one reason or another. Put another way, once you hit pure white (255, 255, 255), you’ve lost all color information for that pixel and even if the image as a whole is darkened (such as to correct exposure), that pixel can only become grayer.

For example, if you’re taking a shot from within a darkened restaurant that happens to include one of its windows, you’ll probably end up with a big ol’ block-o-white where that window would be since the camera is attempting to set its exposure based on the rest of the (darkened) scene. Or, in my case, you might be taking some shots from within a museum that happens to include a handful of skylights (to name just one example). Dangit. I guess when your colorspace has “only” 256 shades of gray, there’s not much you can do. (Maybe shooting RAW might help?)

PS I offer a tip of my hat to Scott Kelby’s book, “The Photoshop CS2 Book for Digital Photographers” — though I’ve been making use of image editors for years, I hadn’t extensively used Photoshop up until I started processing these photos. The book is very down-to-earth and has screenshots every step of the way; I recommend it highly.

Standard photo-entry text: All my photos are released under a Creative Commons license which roughly states that you’re free to “copy, distribute, display, and perform the work”. Also, I’ve resized all the images to 1024-width before uploading them as it can be a bit hard to get your head around a full 10.2 MP image. However, if you want the full-resolution version of any images, just ask.

Food as Landscapes

Little construction men sitting on an eclair which, to them, is life-sized

I ran across these food photographs featuring miniature people placed to resemble a scene. (I'm still not sure if the people were computer generated — while the ice-cream guy looks pretty real, the lighting on the bikers doesn’t seem quite realistic.)

Anyhow, I really enjoyed the photography there; the narrow depth of field (common to most of the photos along the left side of the page) really made me ask myself whether I’d have any chance at duplicating that type of focus effect. After some further thought, though, I realized that my camera probably can’t reproduce a low enough aperture for that kind of thing.

I have little doubt that some computer manipulations were involved in the images — after all, even the most strict in-camera digital photographer generally does some color balance adjustments here and there. Still, I can’t help but wonder if some of the depth of field effects were applied digitally after the fact. Even if that was the case, though, I wouldn’t hold it against the photographer; all the shots came out really well.